In this Honkai Star Rail Imbibitor Lunae Build Guide, we’re going to be covering the Imaginary damage dealer, Imbibitor Lunae. He’s a main carry, who consumes a lot of skill points in order to deal massive damage. Imbibitor Lunae can’t easily fit into just any team but requires players to focus on building around him. If you pick SP-Positive characters for the Imbibitor Lunae team, he can unleash the highest damage in the game. But he doesn’t want to pair with any character that uses a skill every turn.
Honkai: Star Rail Imbibitor Lunae Build Guide
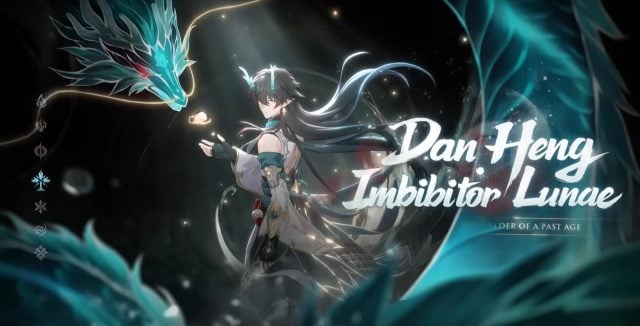
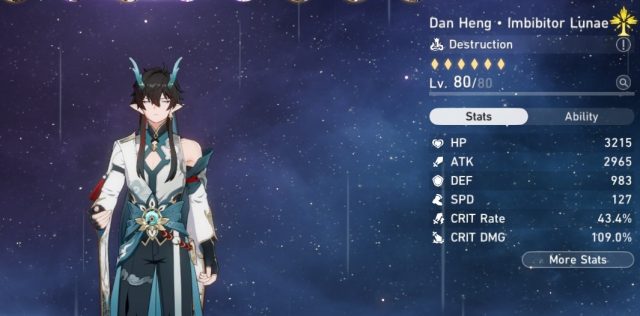
Dan Heng Imbibitor Lunae is a five-star character, who was part of a limited-time banner during the first half of 1.3 patch. While this character looks a lot like the regular Dan Heng, this five-star version is of the Imaginary element from the Destruction Path. This role focuses on consuming a lot of Skill Points (SP), to deal massive damage.
In a sense, the Imbibitor Lunae build is similar to our Qingque Build, minus the randomness of Qingque’s playstyle. Both consume more than one Skill Point upon skill use, to enchant the basic attack several times. She uses said basic attack to nuke enemies in an AOE. In Imbibitor Lunae’s case, he deals most damage to a single target, then some more to adjacent targets.
He’s the polar opposite of Blade, who rarely uses any SP, even though they both are Destruction characters. This implies they can be used together, but the team optimization for Imbibitor Lunae is more complicated than that, as I’ll explain in the guide below.

Honkai: Star Rail Imbibitor Lunae Build Guide: Active Skill
Skill Leveling Priority: Basic Attack > Talent > Skill > Ultimate.
Beneficent Lotus – Normal/Enhanced Attack
There is one form of normal attack, and three levels of enhanced attack, resulting in a total of four levels. These are:
- Normal Attack – 2 Hits – Single Target – generate (+1) SP
- Enhance lvl 1 – 3 Hits – Slightly higher Single Target – consume (-1) SP
- Enhance lvl 2 – 5 Hits – Much higher Single target, minor AOE – consume (-2) SP
- Enhance lvl 3 – 7 Hits – Highest Single Target, high AOE – consume (-3) SP

So as you see, the wide variation of enhanced levels requires Imbibitor Lunae to play strategically. In each turn, there’s a tough decision to be made about how many enhances you should use. Usually, using three Skill Points for maximum damage is worth it. However, that’s only viable if you have 3 SPs. That’s easy to do after the Imbibitor Lunae uses his Ultimate, as he generates two special skill points for himself. That way, he only needs one normal SP to get max enhanced level.
However, in the second and third turn, without the special SP, Imbibitor Lunae face a harder decision. He can use a normal attack, to generate SP for the next turn, or he can contend with a level 2 enhanced attack, which is still a good DPS. Level 1 enhancement on the other hand is the worst option as it consumes SP, and does not grant good damage.
Dracore Libre – Skill
Skills consume SP and enhance the basic attack. It doesn’t have damage on its own, and it doesn’t trigger some effects that should trigger skill use. An example of this is a passive bonus from “The Moles Welcome You” Light Cone. It gives a stacking attack buff when you use a Normal Attack, Skill, and Ultimate. Imbibitor Lunae doesn’t trigger it with the use of his skill, so he only gains two stacks instead of a full three.

The skill also gives a stacking Crit Damage buff after the fourth hit of the enhanced attack. A similar buff to the one from Talent, and stacks with it. It also expires at the end of the turn. At max level it’s 12% Crit Damage per stack, and max at 4 stacks. So at level 3 enhanced which hit 7 times, it reaches max stacks (48% Crit Damage) on the final hit. Or average 17% over the 7 hits.
Skill also doesn’t generate energy for Imbibitor Lunae, which makes his Ultimate a bit harder to recharge so keep that in mind.
Azure’s Aqua Ablutes All – Ultimate
At the cost of 140 energy, Imbibitor Lunae deals big damage to the main target, and a smaller amount of damage to adjacent enemies. The damage here is higher than the lvl 1 enhanced attack, and lower than the lvl 2 or lvl 3 enhanced attack. However, damage is not the main benefit of using his Ultimate.

Using an Ultimate also grants two stacks of “Squama Sacrosancta”, which is effectively is a special Skill Point (SP). So after using the Ultimate, you get two free SP towards your next enhanced attack. That way, it effectively enables the Imbibitor Lunae to use a fully enhanced attack for only 1 SP cost.
If you have an Ultimate at hand, save it to for use in the next turn, right before Imbibitor Lunae’s Enhanced Attack. This will charge some stacks of his talent before you cast an enhanced attack.
Example rotation to generate full energy, and use less SP
To generate the full 140 energy, using the lvl 3 fully enhanced attack three times is not enough. Each lvl 3 enhanced generates 40 energy, so 120 energy total, and 5 from the Ultimate. This is actually 15 energy short from charging the Ultimate, you need to make this up from an extra source. You get energy from getting hit or using a Support character of Light Cones that generates energy.

That said, players will have a hard time using a fully enhanced attack three times to begin with. They will be more likely to be able to use two lvl 3 enhanced attacks, one lvl 2 enhanced, and one normal. That grants (40+40+35+20+5 = 140 energy) in 4 turns, without any outside support. It also makes the Imbibitor Lunae consume only 5 SP per 4 turns, which is much easier to generate. Or you can use a third lvl 3 enhanced instead of a lvl 2 enhanced, for a total of 6 SP instead of 5.
In addition to that, such a rotation can focus the fully enhanced attacks at times where the team can give full buffs. So the damage comes in huge bursts, especially if you use him with Yukong and Bronya.
Righteous Heart – Talent
With each hit an enemy takes, Imbibitor Lunae gains a 10% Crit Damage bonus at max level, up to six times. That makes the number of hits in each attack a huge factor for your strategy using Imbibitor Lunae.
A fully enhanced attack hit 7 times, so you only get full stacks at the very last hit. If we want to calculate an average for the buff, it’s almost 30% Crit Damage. But that gets reduced to an average 20% on lvl 2 enhanced attack.
The stacks expire once Imbibitor Lunae’s turn ends. So a smart way to max his enhanced attack’s Crit Damage buff, is to save his Ultimate until his turn begins. You can use the Ultimate within his turn, so it hits thrice and gives three stacks of Righteous Heart. Now when you start your 7-hit combo (from a lvl 3 enhanced attack), Crit Damage buff starts at 30% on the first hit and reaches max at the third hit. This makes the average buff over 51% Crit Damage, for a lvl 3 enhanced attack. Or 48% for a lvl 2 enhanced attack.
Heaven-Quelling Prismadrakon – Technique
Imbibitor Lunae has an initiate technique, that forces combat to start. It’s mutually exclusive with all other initiate techniques, so you can’t use Imbibitor Lunae and Silverwolf at the same time for example.
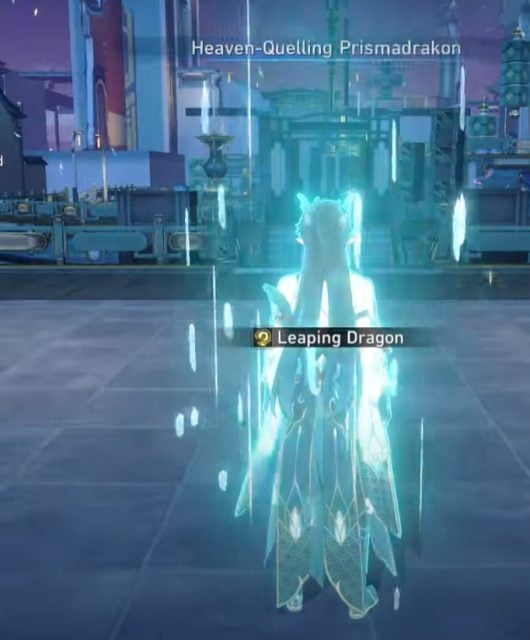

The technique deals some damage to all enemies and gives 1 special SP at the start of combat. This helps casting the first Enhanced Attack without sacrificing buffs. As you start combat with three SP, you may cast two buffs with (-2) SP, and use one normal attack on healer (+1) SP. This leaves you with two SPs only, and with the SP from Technique, Imbibitor Lunae can cast a fully enhanced attack right away.
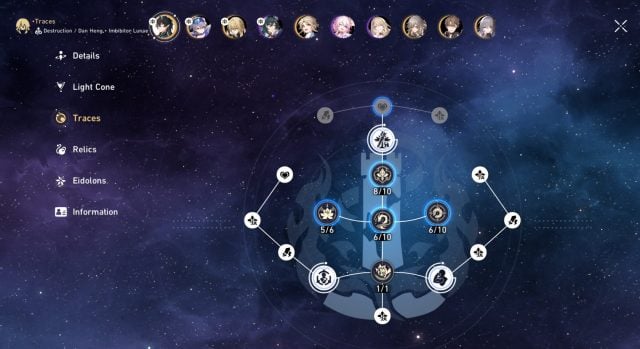
Imbibitor Lunae – Traces
Traces are passive skills that characters unlock after reaching certain ascension levels. For this Honkai: Star Rail Imbibitor Lunae Build, you have to farm and spend resources to unlock Traces, but they give a huge advantage.
As a Destruction Path damage dealer, he should prioritize all major Traces. All of them provide quality of life or more damage. For minor Traces, he also cares much about most of them, since both IMG Damage and Crit Rate contribute a lot to his DPS.

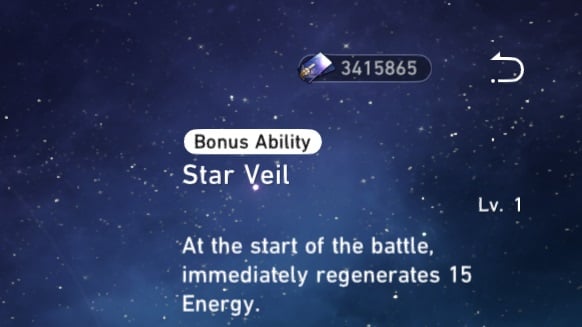
Star Veil – Ascension 2
At the start of the battle, immediately regenerates 15 Energy. It’s a weird bonus because Imbibitor Lunae has a very high energy cost of 140. Every character starts at 50% of their energy cost, so he starts at 70 energy and needs to recharge an extra 70. Using lvl 3 enhanced attack gives 40 energy, and proccing A2 traces gives an extra 15, for a total of 55 energy. That’s still 15 energy short of using the Ultimate and takes an extra turn, nonetheless.

Without an A2 trace, Imbibitor Lunae also takes two turns to charge, with two level 3 enhanced, or one level 3 and one level 2 enhanced. So at base value, this Ascension trace makes no difference.
This changes though, if you are using Tingyun Ultimate to generate energy for Imbibitor Lunae. Tingyun generates 50 energy, and A2 passives give 15, for a total of 65 energy. Now that’s only 5 energy short of casting Ultimate, which he could get from getting hit once. This is not a hard scenario, since Imbibitor Lunae always goes last, and enemies go before him.
Casting his Ultimate before the first turn is a huge boost to the entire rotation, as his first enhanced attack will contribute towards charging his second Ultimate. That results in more Ultimate casts over the entire rotation, and more special SP generated for enhanced attacks.
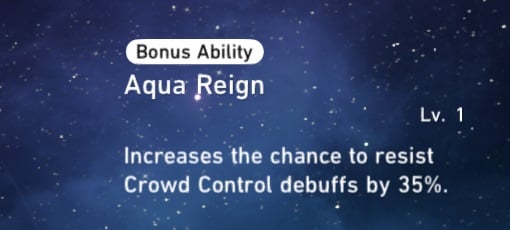
Aqua Reign – Ascension 4
Increases the chance to resist Crowd Control debuffs by 35%. This is a great defensive and offensive bonus that prevents Imbibitor Lunae from getting controlled. So enemies don’t stop him from doing damage, and he keeps going strong.

35% is high enough to make a difference, but it works only against CC debuffs. DoTs will go through easily though, so Imbibitor Lunae might still need a cleanser against some enemies.
Overall, Aqua Reign is a high-priority Trace, that you should get as soon as possible.
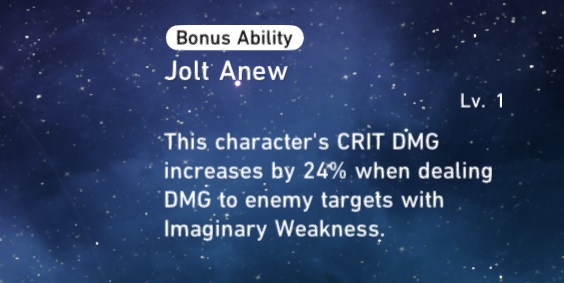
Jolt Anew – Ascension 6
Upon attacking an enemy weak to Imaginary, Imbibitor Lunae gets a 24% extra Crit Damage bonus. It’s a direct damage buff, if enemy’s weakness is correct. You usually use him against enemies weak to Imaginary or use Silver Wolf to inflict the Imaginary weakness. That way, you get good uptime of this buff.

With no source of Imaginary weakness though, this Ascension Trace gives nothing.
Minor Traces
Imbibitor Lunae gets ten minor stats increases, distributed as the following:
- Imaginary Damage (Five nodes)
- Crit Rate (Three Nodes)
- HP (Two Nodes)
These are offensive stats, as damage scaling from Imaginary and Crit stats is high. Imbibitor Lunae gets access to a high Crit Damage bonus from both Talent and A6 Trace. Therefore, Crit Rate becomes a very important stat to reach the optimal 1:2 ratio. The three minor traces give a 12% Crit rate, which helps towards that goal.
Imbibitor Lunae Light Cone
For this Honkai: Star Rail Imbibitor Lunae Build, gear is a crucial part, and the Light Cone is a major part of gearing. Imbibitor Lunae has access to a high amount of damage modifiers, and his abilities have high attack modifiers. That’s why he relies so much on the Attack stat of the Light Cone. He also suits generic offensive stats, such as Crit, and Damage bonus.
Imbibitor Lunae is of the “Destruction” Path, and among Light Cones of this path, there are several light cones worth using.
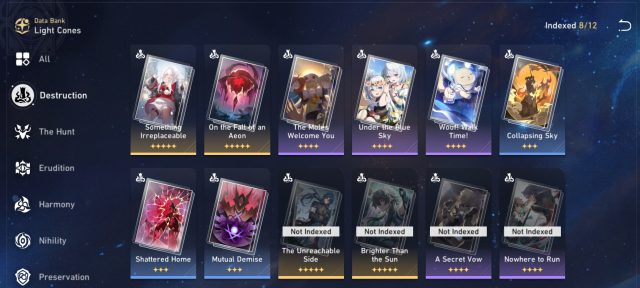

The Moles Welcome You – Four Star
The bare minimum pick for Imbibitor Lunae is a four-star Light Cone, as he performs poorly with three star Light Cones. This Light Cone gives him two stacks of the attack buff, which is 24% ~ 48% Attack, depending on the Superimposition tier. It has a moderate 476 base attack, so it’s not the best choice, and not worth investing if you have an alternative.
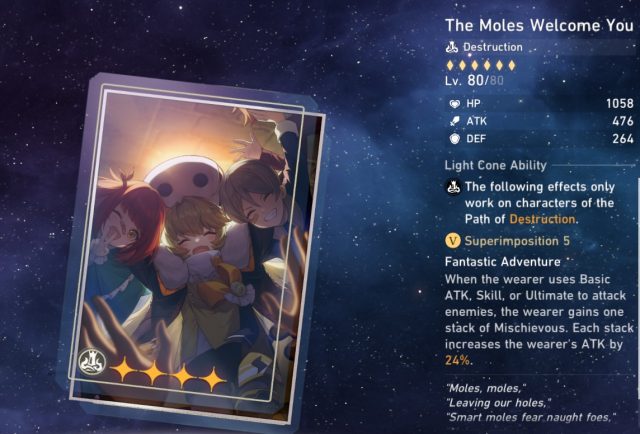

The only case where you use The Moles Welcome You is when you have high Superimposition like S5 on it, don’t have Nowhere to Run, and don’t plan on buying On the Fall of an Aeon from Herta Shop.
Nowhere to Run – Four Star
Another four star option that’s slightly better than “The Moles Welcome You”. It has similar 24%~48% Attack stat, but paired with higher base Attack of 529. On top of that, it heal the wearer a bit, after defeating enemies, but that’s not affecting damage output.
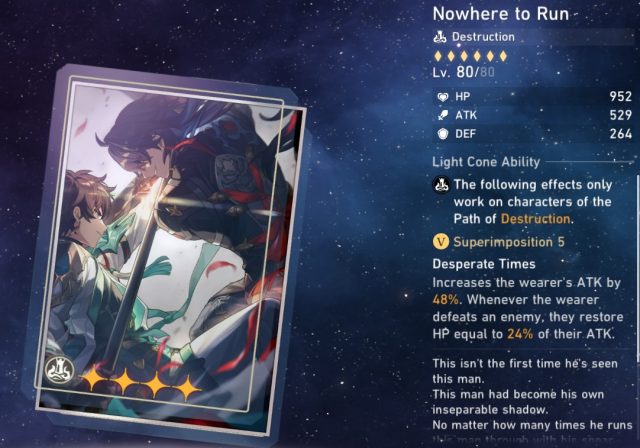

This is the recommended Light Cone if you spent your Herta Bonds on another Light Cone in Herta Store. It have solid performance, especially at higher Superimposition. Yet, it can’t beat the Light Cone from Herta Store.
On the Fall of an Aeon – Five Star
This is a free-to-play option, that you can pick from Herta Store. You can get to maximum Superimposition from merely playing the Simulated Universe every week, and buying the tier-up materials from the store. There’s an opportunity cost for sure because buying “On the Fall of an Aeon” delays getting any other Light Cone from the same store by months. However, it’s the second-best option for Imbibitor Lunae, behind his signature LC.
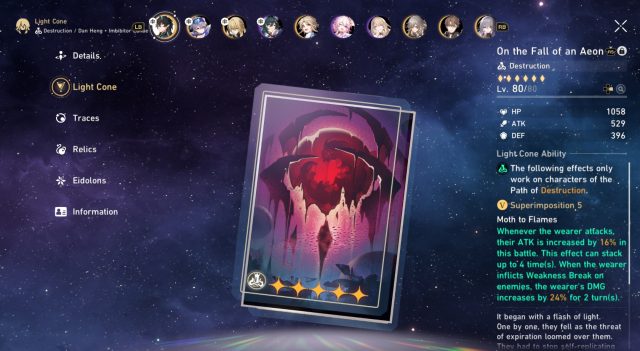

The On the Fall of an Aeon Light Cone gives a stacking Attack buff, with an up to 64% Attack stat after performing four Attacks. So three normal/enhanced attacks, and one Ultimate. When the wearer inflicts a weakness break on enemies, he gains a 24% damage buff for two turns at S5. This buff is easier to maintain than some other LCs that require a kill. Breaking enemies is usually a lot faster than killing them, and can occur a couple of times against bosses.
Brighter Than the Sun – Five Star (Limited)
Imbibitor Lunae’s signature Light Cone “Brighter Than the Sun” is an upgrade, but not a huge one over Shop “On the Fall of an Aeon“. However, it gives Crit Rate bonus, which is very dearly required, and this LC is easy shortcut to it. It make building him much more flexible, and with it, you can switch to Crit Damage Body for higher damage.
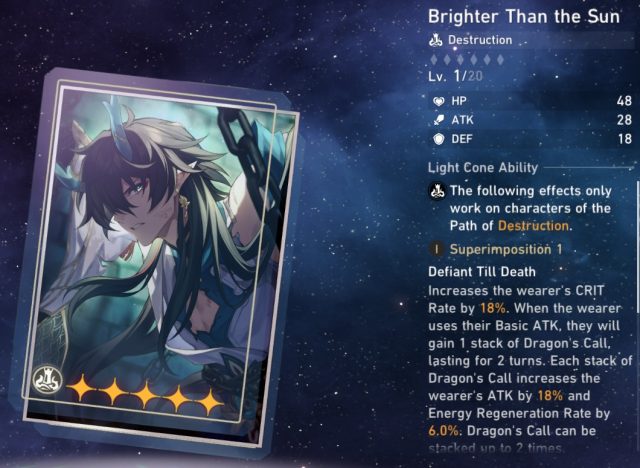

In addition to Crit Rate, it also give Attack, and Energy Generation %. The latter could shorten his rotation one turn, and enable him to Ultimate more often.
Honkai: Star Rail Imbibitor Lunae Build – Stats
In this Honkai: Star Rail Imbibitor Lunae Build we’ll cover all four Relics slots: Head, Gloves, Body, and Feet. As well as the two accessories slots, Sphere and Rope. Head always comes with a Flat HP main stat, and Gloves comes with a Flat Attack main stat. Then Body, Feet, Sphere, and Rope come with random stats. So gearing the Head and Gloves will lean more towards finding the best sub-stats, while the other four also have to roll a good main stat.

For Imbibitor Lunae, has a massive Attack modifier on his enhanced attacks, so any small investment in the Attack stat, returns as big damage. For this reason, we use Attack main stat on Rope, Imaginary damage on Sphere, Speed or Attack on Feet, and either Crit or Attack on Body.
Speed vs. Attack Boots
For effective rotation, Imbibitor Lunae’s speed must be slower than the rest of the team. He requires a lot of Skill Points, and the only way to generate enough is by having his team going before him. At the same time, he prefers to get extra turns per cycle, to compensate for his long rotation.
This dilemma can be solved by having the entire team going fast, so the slowest character (Imbibitor Lunae) is still relatively fast. A suggested Speed for him is 134 with Speed Feet. He has 102 base Speed, and Boots gives 25 Speed, so he only needs 7 extra Speed from sub stats. That’s the easiest way to build him.
The other option is going for Attack Boots, which have a huge impact on boosting his damage per turn but get relatively fewer turns. A good speed to reach without Speed Boots is 121, which requires a massive 19-speed from sub-stats. It’s achievable but requires more investment and optimization. One way to make it easier is by using the Musketeer set for an extra 6-speed.
Crit Rate/Crit Damage vs. Attack Body
The goal of every character that can score Critical Hits is to come as close to 1:2 Crit Rate: Crit Damage ratio. Imbibitor Lunae is no exception, and he has many sources of Crit stats built into his kit.
His traces give a 12% Crit Rate, on top of the 5% base, with a total of 18%. While his A6 gives 24% Crit Damage, and his Talent gives an average 20%, 30%, 48%, or 51%, depending on the scenario. That added on to a 50% Base Crit Damage, and an average 17% Crit Damage from Skill on lvl 3 enhanced. This results in 94%, 121%, 124%, or 142% Crit Damage. So the ratio is very much askew, and needs a lot of Crit Rate to balance it out.
A Crit Rate main stat on Body gives 32.4%, so the Crit Rate reaches 50% after adding base Crit and Traces. This is much more balanced, and allow player to build balanced sub-stats.
If you are using Yukong support, she buffs both Crit Damage and Crit Rate, so you maintain the same balance. If you use Bronya as a Support, she buffs Crit Damage even further, so you should still prioritize Crit Rate on Body.
Sub Stats
Speed (up to 121 or 134) > Crit Rate > Attack > Crit Damage > Speed (after threshold)
Imbibitor Lunae Relic Sets
There are many options for Relic Sets in this Honkai Star Rail Imbibitor Lunae build. We aim to give players the best choice, and the most efficient alternatives. Relic sets come from farming Caverns of Corrosion, and Planetary Relic Sets come from the Simulated Universe. These domains drop two sets each, so the most effective way to farm them is by picking a domain that drops two good sets. This will allow you to gear up Imbibitor Lunae and another character or two in the process. This lowers the Trailblazer Power cost to gear up your team.
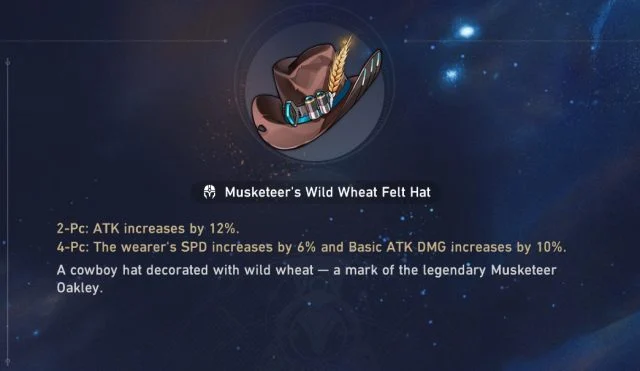
Musketeer of Wild Wheat – Relic Set
The standard reward for many quests, weekly bosses, and farming Path of Gelid Wind Cavern. The set gives attack, speed, and normal attack damage. So it has everything the Imbibitor Lunae needs and more.
The Speed can be very useful to help him reach the target 121, or 134 speed, while using Attack Feet, not Speed one. And the Normal Attack damage affects all enhanced attacks as well. It’s a very competitive option in most cases, but there’s still room for improvement, if you seek an maximum optimization.

Hybrid 2x Musketeer / 2x Wastelander – Relic Set
This option is better than the full Muskteer set if you don’t need the Speed boost. You lose 10% on normal attack damage, and gain 10% universal Imaginary damage. This affects all of Imbibitor Lunae’s damage, including Ultimate damage.
Being a hybrid choice, it also helps to get better sub-stats, as you pick the best two pieces from each set. So a very solid choice that’s usually the best choice until the very endgame. Also the cheapest choice, as it costs less Trailblazer power to farm two pieces from each set. This is my recommended pick.
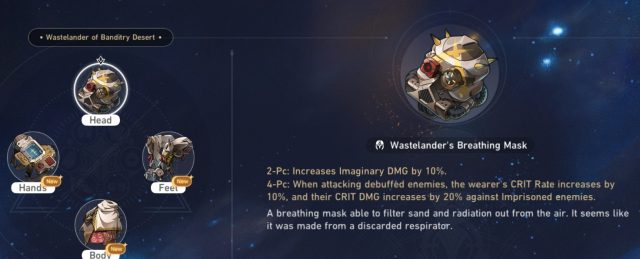
Wastelander of Banditry Desert – Relic Set
Using 4 pieces Imaginary set could be better, in some situations. The bonus from 4 pieces is conditional, you get a 10% Crit rate against debuffed enemies. Also, you gain 20% Crit Damage against Imprisoned enemies.
Imbibitor Lunae himself doesn’t inflict debuffs, unless he causes an Imaginary break. Imaginary supports such as Yukong, and Luocha don’t inflict debuffs as well. So to gain any benefit from a full Imaginary Set, you need a dedicated debuffer on the team. Silver Wolf is the ideal pick, but she’s usually in high demand in most teams, so she might be available, or the player might not have her to begin with.
An alternative debuffer is Pela, as she can also boost Imbibitor Lunae’s damage by shredding enemy Def with her Ultimate. Pela is very SP-positive character, and she can use a Wind Set to gain even more turns and generate more SP.
The other conditional bonus on 4 pieces set bonus is 20% Crit Damage against Imprisoned enemies. Imprison comes only from Welt’s Ultimate, and Imaginary Break. But Welt is the best match for this Imbibitor Lunae team, and Breaks don’t last forever. So you only get this bonus partially, after a break. Overall, the Imaginary Set is a decent pick, but less universal.

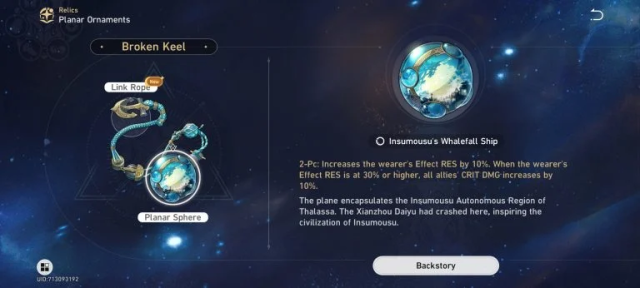
Space Sealing Station – Planetary Ornament
The standard offensive set for attack-scaling characters. It increases Imbibitor Lunae own Attack value, which scales very well with his high modifiers. Space Sealing Station gives 24% Attack, so nothing comes close to it. But it requires 120 speed or more, so you need to be careful to meet this requirement if you are not using Speed Feet.
Space Sealing Station comes from World 3 in the Simulated Universe, paired with Fleet of the Ageless, one of the best support sets for the Imbibitor Lunae team. So farming one world will help you equip the entire team.

Rutilant Arena – Planetary Ornament
This set gives an unconditional 8% Crit Rate, which helps Imbibitor Lunae reach the desired high Crit Rate. However, the conditional bonus of it requires a massive 70% Crit Rate to get. This is very high amount, especially with him having most bonuses from his kit as Crit Damage instead. But with time investment and farming Relics, you can get there eventually.
If the condition is met, Imbibitor Lunae gets 20% Basic Attack damage, which scales both normal and enhanced attacks. So it’s the best Ornament set after you reach 70% Crit Rate.

Team Composition
The high SP consumption rate of Imbibitor Lunae is the most determining factor in choosing a team for him. He must pair with several SP-Positive characters, to spare him the needed SP. Another choice is characters that provide energy regeneration for him since he can provide himself with two extra SP after using Ultimate.
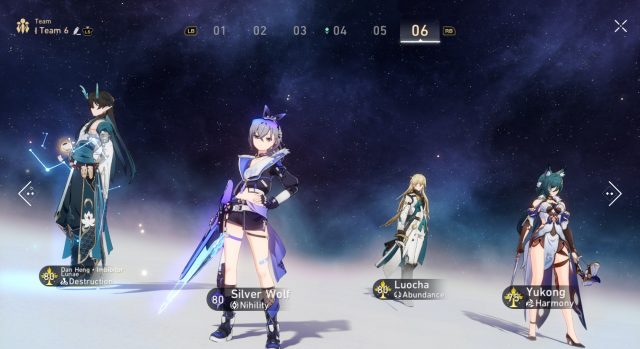
For energy characters, there’s only Tingyun in the game, and she’s also SP-positive. Then he requires a healer, in which Luocha is the best pick, and a second buffer or debuffer, such as Yukong, or Silver Wolf. He basically can replace Welt in Yukong Mono Imaginary team, and that would be ideal.
There are also certain versions of his team with Bronya. That relies on Bronya going super fast and advancing her own turn with normal attacks. And Bronya can generate a lot more SP than any other character, and she still provides buffs with her Ultimate.

A strong offensive support from Harmony Path
You can use Yukong, Bronya, or Tingyun, or two of them. Imbibitor Lunae is a perfect damage dealer, that can carry the team on his own. So using several offensive supports with him is ideal, and will boost team damage more than adding another damage dealer.
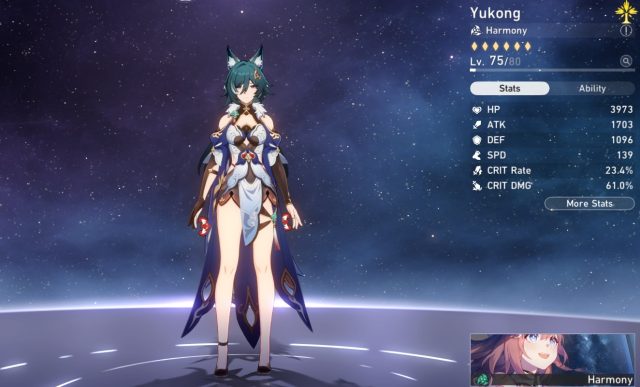
Yukong is ideal against enemies weak to imaginary, which is mostly where you use Imbibitor Lunae. She has a very strong break, which helps thin out enemy shields, to enables him to deal the breaking hit. This triggers the bonus from the On the Fall of an Aeon Light Cone, for more damage. Yukong also has high damage on her own, and she buffs attacks with her skill, Crit Rate, and Crit Damage with her Ultimate.
Yukong is best with Imbibitor Lunae when she’s at E6. Her very last Eidolon enabled her to trigger all her buffs with Ultimate, without using the skill. So she can stay SP-positive and provide buffs when she uses the Ultimate. Or be SP-neutral, alternating between Skill and Normal, and provide buffs for every enhanced attack of Imbibitor Lunae.
The damage bonus she provides to Imaginary characters is massive. With Planetary Rendezvous, and her passive, Yukong can provide up to 36% Imaginary damage by merely existing in the team, without using any skill or Ultimate. Then she buffs Attack by 75%, Crit Rate up to 27%, and Crit Damage up to 65% by using her abilities.

Secondary Offensive Support from the Harmony or Nihility Path
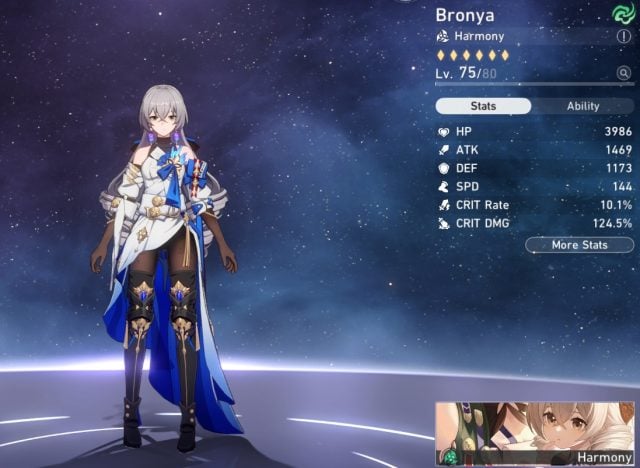
Bronya advances her own turn by up to 30% when she uses Normal Attack, and she generates SP. So if we ignore her skill, and spam her normal attacks, she will get many more turns. That way, she generates excessive SP for Imbibitor Lunae.
Her buff from Ultimate is Attack and Crit Damage, on top of her 10% damage from her A6 passive. The Ultimate lasts two turns and takes more than that to recharge. But since Imbibitor Lunae is optimized for his speed to be the slowest, and Bronya to be the fastest, on top of advancing forward; Bronya can get so many turns in before Imbibitor Lunae gets his third turn. So in this scenario, he gets the high uptime of Bronya buffs.
If Bronya gets her signature Light Cone, gets E1, or both. Then she can start refunding the SP she uses with her Skill. So she can use her skill in some turns, especially when Imbibitor Lunae has his own Ultimate ready.

Alternative Supports
Another option for our Honkai Star Rail Imbibitor Lunae build is Tingyun, for extra 50 energy, and 20% Speed every Ultimate. It also has a nice attack bonus with Tinyun’s Skill. Tingyun can be built with a very high speed and uses the Dance Dance Dance Light Cone to advance team turns. So even at base speed, Imbibitor Lunae may get two turns in the first cycle.
Finally, against enemies that are not weak to Imaginary, you may use Silver Wolf. If the entire team is Imaginary and Quantum, and the enemy is already weak to Quantum, Silver Wolf will guarantee Imaginary weakness with one skill cast. This will help Imbibitor Lunae trigger his A6 trace for more Crit Damage. on top of the massive debuffs Silver Wolf inflicts on the enemy.

Defensive Support from the Abundance or Preservation Path
If you want to create a mono Imaginary team with Silver Wolf, then your ideal pick is either Luocha or Lynx. But if the enemy is already weak to Imaginary, you don’t care much about the healer or shielder element.
You may use any of Fire MC, March 7th, Natasha, Bailu, Luocha, Lynx, or Fu Xuan. This depends on what you have available in your account since the Imbibitor Lunae kit doesn’t require anything special from the defensive character.
Final Tips
Imbibitor Lunae has the strongest damage dealer built in Honkai Star Rail so far. He consumes a lot of Skill Points, but has a big payoff, and the current support roster works well with his playstyle. You may use one rotation to build SP, and expend them in the next rotation for even more damage.
While building my Imbibitor Lunae, I gave him the +12 hybrid relic set my Welt was using. I barely leveled his normal attack to level 7, without full traces, but at level 75 he could already do over 200k damage in a single cast of a fully Enhanced attack. That was with Speed Boots slotted, so he gets more turns. If optimized with max-level traces, and relics, he can do double this damage easily, becoming unstoppable.
There’s also no other character that’s really comparable, so I ranked him as an SS+ tier in both my single target and AOE DPS tier list. What did you think of this build? Let us know in the comments below.
Stay tuned for more Honkai: Star Rail Guides. For more Honkai: Star Rail content, check our Honkai Star Rail Guide: Best Light Cones To Buy and Honkai: Star Rail Blade Build Guide.
Log in to leave a Comment